Update 16-May-2016:
10% Discount: You can now get yourself a 10% discount on any Interfit products including the S1 if you purchase directly from Interfit’s own shop by using the promo code JAKOB10 (case sensitive so make sure you use all CAPITALS) at the checkout billing page.
Danish Apple Photography and Interfit Photographic
For those of you following us on Facebook, you may have seen our recent announcement that Jakob has been selected as a Brand Ambassador for Interfit Photographic.
So what exactly does that mean for us? Firstly, we are very proud to be associated with the Interfit brand, and this partnership expands our options significantly for adding creativity to an image quickly and easily. As part of that arrangement and in exchange for providing me with lighting equipment, Interfit have asked me to provide them with photos and videos produced using their products.
Let’s just be clear about this, yes, they have supplied me with lighting equipment, but if you were given the keys to a car with no brakes, would you still drive it? This stuff HAS TO work for me to use it and it has to add to my existing lighting set ups rather than take away or complicate things.
If you have any questions, please feel free to ask away in the comments.
The S1 – In A Nutshell
So for those that want to skip the waffle of this Interfit S1 review – It is an amazing piece of kit. It’s a durable and reasonably lightweight, high-powered flash unit with consistent TTL or manual exposure output. It’s incredibly easy and intuitive to use, with the Bowens S-mount for modifiers. The remote is super easy to use too, allowing full TTL and manual control from camera. Compared with the Profoto B1, Interfit have balanced the need for more battery life with a slightly reduced flash recycle time at full power. And, if you have got access to a power source, the S1 trumps the B1 by providing you with the ability to power the flash from mains electric using the supplied adapter. So even if the battery runs out of juice, you can just plug it in and keep shooting. If you’re reading this because you are thinking of buying it, let me make it easy for you – buy two!
We recently used the S1 at a wedding and we will be sharing thoughts and a behind the scenes video here in a few days time. In the meantime, for a brief video review of this unit, check out the video above and keep an eye on our Youtube channel for future videos.
Interfit S1 Review
I was hugely excited to be given the opportunity to start shooting with the Interfit S1 monolight. For quite some time I have been renting Profoto B1 monolights, considered by many to be top-of-the-class when it comes to relatively high-power portable lighting (500W with a built in battery in the unit). It seems unfair to compare the S1 against a flash twice as expensive but the fact is there is very little else out there and as I have used the B1 a lot, it makes for an easy benchmark comparison. At the same time, I was sitting there thinking how on earth can they sell it for half the price? There must be a catch, right? Nope… not really… unless you want it in any colour other than black.
I received the lights the day before I had to head to London for a week to assist at the SWPP Convention. You may have already seen the quick Interfit S1 unboxing video I did and you can check out exactly what you get out of the box when you purchase an S1 by watching that video.
Build
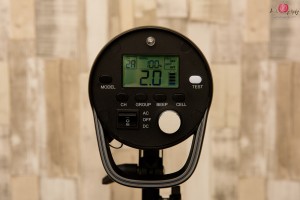
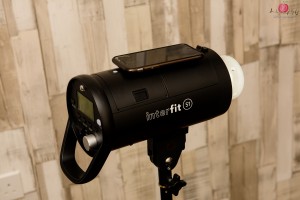
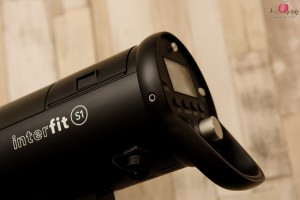
Back of the Interfit S1 – the little clear bulb thing on the top is the optical slave cell for remote firing without using a remote or pc-sync cable. (Sensitive enough that it is capable of being fired with camera built-in flash)
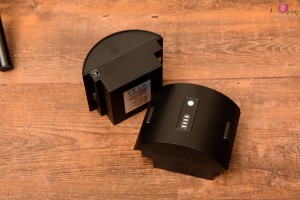
I love the look and feel of the unit, when the battery is attached it sits flush within the flash body and there are no hard edges or lines. The battery itself has a button on it for visible display at any time of how much power is left. You can see that without turning the unit on and (unlike the Profoto) without removing it from the flash. The carry handle at the back feels solid and I would have no qualms about using it to swing the flash around if I had to.
Attaching modifiers with the Bowens S-mount feels solid and I have had large octa-boxes and strip soft boxes attached comfortably without any unexpected flex or give in the mount.
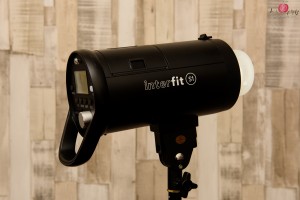
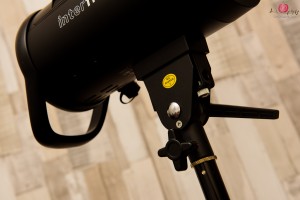
There’s an umbrella mount built into the section that attaches to your light-stands, as well as air vents underneath rather than to the side – handy if you get caught out in the rain and don’t want water dripping straight through into the unit.
The flash tube itself is not recessed. There is a frosted glass dome protecting the tube. For a lot of people, they will be pleased to hear this. Having it out front means the best possible spread of light out in all directions. Sticking it behind a diffuser would mean you lose a bit of power and you wouldn’t get that full 360 degree throw. The great thing is that the dome protecting the tube also means you can cover it with gels relatively easily, and then still attach all your modifiers over the top. Normally, with an open bulb flash you would need to fashion something together to hold the gel without touching the flash tube e.g. when you are wanting a gelled softbox. Of course, you can also get the standard S-mount gel holders for when you’re using umbrellas.
The S1 is also ever-so-slightly lighter than the B1 (2.85kg/6.3lb vs 3kg/6.6lb). It’s not a major difference, but if you’re carrying two of these around on your back, you will start to feel it over the course of a day. Those that have switched from using full frame DSLRs to mirrorless alternatives will be able to relate to this.
Usage
The S1 does come with a quick reference user guide. I have never needed to look at it. The buttons are self-explanatory, the remote works as expected and so there’s really nothing to it. Plug in (oh wait, you don’t need to…) turn on and away you go. This thing is easier to get to grips with than even an iPhone, and that only has ONE button.
TTL works great and allows you to jump right in, set your camera settings how you want them and let the flash work out correct exposure for itself. A little trick – if you want perfectly exposed skin, zoom in on your subject (or if you’re using a prime lens, move closer) until they fill the frame, take a shot in TTL. Switch to manual mode and the flash will lock the exposure settings from the TTL shot. Now you can zoom out, compose how you want the shot and every frame you’ll know your subject has been perfectly exposed. The fact that the flash memorises the exposure just by switching to manual is very cool and makes life A LOT easier.
The only niggle I have (which will only affect you when you’re using this TTL-exposure locking method) is this; the S1 unit remembers the power settings when you switch, and you can also see them on the back on the unit, which is great! However, the transmitter itself does not sync up to show what those power settings were. Provided you make no further adjustment on the transmitter, it’s not a problem as you will continue to get the same locked-down power output shot after shot.
However, once you go to adjust power settings using the remote, it will start at whatever power setting previously set in manual on the remote. It’s not a major issue, you just need to make a note of the back of the flash LCD panel to see what the power settings were before you adjust them using the remote transmitter. Again, keep in mind that so long as you make no adjustments after switching to manual from TTL, or provided you can see the back of your S1, it’s not exactly a big deal.
When it comes to power, Interfit have made an interesting decision regarding the battery. Whilst you won’t get the same recycle speed of a B1, you will get substantially more shots out of a single battery in return. I was hesitant at first but thinking back to the number of times on shoots where I have needed to swap out the batteries on the Profoto B1’s that I was using, it makes sense.
To put that into real terms, compared to the Profoto, you’re going to get over 100 extra full power pops out of the S1 (350 against the B1’s 220), with a recycle time of around 3seconds vs 2seconds. It’s a touch slower than the Profoto, but in exchange you will be able to continue shooting for a lot longer. Once you drop the power settings the recycle times fall with it, and switch to HSS and you get even more shots. Unless you really are always shooting at full power, the recycle times are likely going to be irrelevant. Battery life if you are out on location with no accessible power sources is most definitely not going to be irrelevant. And yes, you can carry extra batteries, but two extra batteries is equivalent to a bag of sugar! You try walking round with a 1kg bag of sugar at your next shoot and tell me you wouldn’t prefer to be without it! Oh wait, you want a 4 light set up? Time to start carrying a very small baby.
So let’s shoot – firing off frame after frame in either TTL or manual, I’m finding very little fluctuation in the exposure. Interfit themselves claim it to be a colour temperature of 5700K ±100K. I’d say that’s about right and outside of HSS, maybe even slightly more consistent than that.
I did a rough test to show how quickly you can shoot on battery (plugged into a wall makes no difference) for every frame to be lit consecutively and you can see the results in the table below;
| Power setting | Watts Output | FPS shooting |
| 2 | 7.8 | 2.8 |
| 3 | 15.6 | 2.66 |
| 4 | 31.2 | 2 |
| 5 | 62.5 | 1.5 |
| 6 | 125 | 1 |
| 7 | 250 | 0.5 |
| 8 | 500 | 0.3 |
What I found was that, at a power setting of between 2 and 3, you were not quite getting 3 frames per second. You could get one lit, one unlit, followed by another two perfectly lit shots, and then every third frame thereafter would be unlit. But always two in a row lit, followed by the third one being missed. At higher FPS, at least in the lower power ranges, you can generally count on getting a sequence of two lit, followed by one or more unlit exposures. Good to know if you need to plan for capturing ‘the moment’. With a little forethought or planning, you can use that predictability to get at least two well-lit frames in quick succession at higher frame rates than those I mention above.
Up to a power setting of 4, you can achieve at least 2 frames per second continuously.
And anywhere up to 6.2 power, you can shoot continuously every second and every shot will be perfectly lit. Bump the power up to 6.3 and you will start to get the occasional unlit exposure where the flash recycle rate is not keeping up. As is documented, at full power, you need to give the flash approximately 3 seconds to recycle, but drop the power just a little bit and immediately the unit becomes quite responsive.
At full power output, the recycle time is no different to most speed-lights at full power (though the speed-light has substantially less light-oomph, of course). At anything below full power, the recycle becomes unnoticeable in normal shooting. It’s only really when you start shooting using a continuous high frame rate that you’ll start to have to plan a little bit. One such instance where we might come across this is with our flour and smoke shots where I will inevitably want to be shooting at least 3, 4 or even 5fps and it has always been a power/recycle balancing act. With the S1, I’ll have more leeway. Of course, if you do need every single frame in a higher speed sequence, you could use multiple S1s side by side, allowing you to drop the power output and thereby increase recycle rate.
Keep your eyes peeled for a future shoot where we will do exactly that.
Speaking of power – you may know already but this is 500Ws, without any wires! That’s enough to shoot in broad daylight and overpower the sun.
When it comes to flash duration, the IGBT technology makes freezing motion of smoke, flour or water a breeze. Forget about the technicalities behind it all, just know this – with a flash duration of between 1/1000th and 1/9000th of a second (at full to lowest power settings respectively) you should have no problem at all capturing crisp, sharp, water splashes, with no visible motion blur. For the hell of it, I decided to give the claims a test and shoot a few water droplets – with apologies in advance for the boring subject matter;

Interfit S1 water splash – full resolution image here

Interfit S1 water droplets – full resolution
I’d say that’s pretty darn sharp with no visible motion blur, but far be it from me to judge – have a look at the full resolution images.
For good measure, the above were shot at 2.0 power, i.e. the shortest possible flash duration. I also shot the same at 5.0 power, therefore closer to 1/1000 of a second. Not so much visible in the smaller files (here and here) but in the full resolution (here and here), a slight blurring is definitely visible by comparison – proof that you really do need that faster duration that the S1 is capable of, to avoid the blurring.
Remote
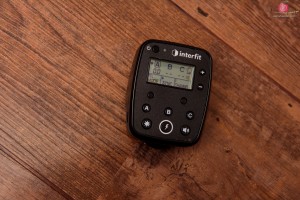
Interfit S1 monolight flash unit TTL remote – with modelling light icon top left and low battery indicator top right
TTL control from the remote allows you to compensate by ± 3 stops and the manual mode allows you to go in 1/10th stop increments from the full 500W down to 7.8W at lowest power setting.
Changing settings is easy enough and the flash responds to the instructions no problem at all. You can remotely turn the beep on and off too so if you want some initial confirmations before turning the unit to silent (or vice versa) you can do that. Visual indicators on the unit in the form of an LED also helps if you want to work in complete silence.
You can control up to 3 groups separately. You can use either TTL or full manual and you can control each group and adjust power individually, as well as turning modelling lights on/off individually – very handy for when you want to check how the light is going to fall from the camera’s viewpoint, one flash at a time.
Keep in mind that in order to shoot with High Speed Sync (HSS) i.e. above the normal flash sync speed, you will have to use manual mode rather than TTL. If you really want to rely on TTL for your first exposure, a workaround would be to shoot at normal sync speed with TTL to get your correct exposure, then switch to manual and adjust from there, increasing/decreasing flash and camera settings accordingly. An extra step sure, but the power output is reliable and consistent enough that over time you’ll get to know your flash and instinctively know where you need to be anyway.
Initially, I thought when shooting in anger that the remote occasionally required a little bit of patience when you want to change settings. It felt like there was a momentary pause after taking a shot where the transmitter was waiting for the flash unit to respond before being able to send across new power settings. I’ve realised now that this was more down to user error than anything else – if you hold the +/- buttons down rather than just tap them, the settings adjust almost instantaneously. Otherwise, if all you do is tap them, (and only if you do so immediately after taking a shot), you may come across the momentary pause that I’m talking about.
The remote does seem to drain its own battery life rather quickly, but I did not notice any drain occurring out of use, i.e. if it was switched off. Even with that said, it still seems to last forever with the low battery warning going so you won’t ever face being caught off guard and not having batteries to hand (and the remote uses the standard triple-A, and you can even use rechargeables)
Modelling Light
The modelling light can be adjusted between off, half power and full power. At full power, it’s a 10W LED bulb – bright enough to use indoors to see the impact of the light, though it’s not particularly powerful for outdoor use. Much quicker just to fire off a couple of test-shots or use your eye and press the test button on the remote a couple of times. What is nice is that it doesn’t just switch off after a moment of hesitation and even with it on at full power for well over 2 hours, it hadn’t made a dent in the power level indicators on the battery.
Firmware Upgradeable
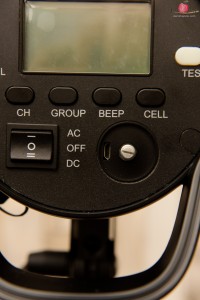
Back of the S1 with the power adjustment knob removed to reveal the mini-USB port for firmware updates
Another great thing about these units is that both the flash and the controller are firmware upgradeable. That’s good because it means additional features can be added as technology moves forward.
Using The S1 With Other Flashes
Another little thing – the S1 has both a pc-sync connection and an optical trigger (which can be disabled), so you can use your speed-lights or speed-light controllers to fire the S1. In my case, I have a set of Yongnuo TTL transmitters which allows me to wirelessly control TTL or manual power settings of my Nikon speedlights. Using the pc sync cable I can have a full blown lighting setup including multiple speedlights and several S1 units altogether. You can’t shoot the S1 in TTL in this manner but it does open up even more options for big multiple-light set ups. Provided you have the S1 remote, you can still wirelessly control your power settings without ever having to go anywhere near the unit itself.
Price
Best of all is the price. You’re getting a whole lot of bang for your buck with the S1, which retails at half the price of the Profoto B1. At the time of writing, they are priced at £799/$999. You can get two of these for the price of one B1. And with the Bowens S-mount, you have a whole world of modifiers available to you at reasonable prices (exceedingly cheap if you’re willing to brave the eBay alternatives). I ran a quick budget comparison of what I would be spending for a full three flash set up, including strip soft boxes, a large octa-box, spare batteries, two remotes and various little accessories and the saving of the Interfit S1 vs the equivalent Profoto B1 was enough to buy a small 2nd-hand car (seriously!). In fact, I worked out that in the last year for the money I spent on renting the B1 units I could actually just as well have bought an S1 and still had change left over. When you are using equipment so often, there’s a lot to be said for owning it versus the sinkhole that is endless rental costs with no ownership at the end.
Sure if you are a millionaire and money is no object, go for the Profoto. You’ll be happy. It’s an awesome piece of kit. But if you are trying to make a living out of your photography or just want to be able to justify the expense to your partner, try this sentence “I’m getting this for 50% of what it would cost me otherwise!”
10% Discount: You can now get yourself a 10% discount on any Interfit products including the S1 if you purchase directly from Interfit’s own shop by using the promo code JAKOB10 (case sensitive so make sure you use all CAPITALS) at the checkout billing page.
Niggles
Ok, so by now you’re reading this and thinking “AMBASSADOR-SPONSOR-EVERYTHING-IS-AWESOME-KERCHING!” Let me stop you there. As I said from the start, I get paid to photograph, I don’t do it for free. My reputation relies on me not making compromises that will impact on my work. Yes, I’ll compromise on price if it can be justified. But at the end of the day, light is light regardless of what’s producing it. When I can get a comparable product at a much better price that is just as effective and reliable, why wouldn’t I?
I don’t think there’s a single piece of kit that I own that I don’t have at least one niggle with; My Nikon D810 uses two different memory card types. The beautiful Lensbaby Velvet 56mm lens is manual focus only. My studio isn’t big enough or waterproof enough. My toaster burns the toast. The question is whether these things are enough to cause me to look for alternatives (newsflash: we no longer have a toaster). The S1 sacrifices some speed of recycling in exchange for being able to shoot for longer. I’m still in two minds whether I prefer this or not. Over the course of a year’s worth of shoots, I will no doubt have a much clearer opinion. For the moment, it’s nice not to have to look at the cost of an extra battery. In fact, it’s nice to completely forget about looking at how much power is left on the unit midway through a shoot, in case you need to plan for changing out the battery when there’s a break in play. Very nice.
The ability to lock in the TTL exposure by switching to manual is absolutely brilliant. You don’t know how nice that is until you try it. It’s one of my favourite features and I am so glad Interfit implemented it. I just wish they had got the remote syncing so that you can lock in and adjust from there, rather than making note of the exposure before changing. The workaround of using exposure compensation whilst shooting in TTL before locking it in isn’t ideal, but there is a simple workaround.
My only other request if there was going to be one, would be for the S1 to have a built-in stroboscopic mode. It’s not impossible. You can use 3rd-party remotes or even the built-in optical trigger at the lower power settings to allow sufficiently fast enough recycling to make it possible.
Summary
The highest praise I can give is this:
My biggest concern about these units from reading various online forums and pre-production test reviews was to do with reliability. I’ve been fortunate enough to receive some S1 units in my role as Brand Ambassador allowing me to ‘test the water’ before jumping right on in. I never came across any reliability issues and I can safely say now that, should our relationship ever come to an end, I will change my address, call them up and tell them I lost the flashes down a well. They are not getting these units back, ever. If I had to, I would spend my money and buy them just to keep using them, it’s an absolute no-brainer.







6 Comments
Thank you for the review. I Nikon speedlights and Pocket Wizards TT5’s.
How can I incorporate them with the S1?
Hi Jimmy
I believe the TT5 has a socket for plugging in a PC-sync adapter, so that would be one way – i.e. use the TT5 as your controller and pc-sync between a receiver and the S1.
I mentioned elsewhere that I use the YN-622 transmitter/transceiver setup, and in that case the transmitter itself can’t be used as it has no hotshoe on it (neither does the S1 transmitter, so you couldn’t reverse the setup either).
I tried piggybacking the S1 transmitter onto a YN622 transceiver, sat on the camera, but no luck.
I also tried using the normal YN622 transmitter, and placing the S1 transmitter onto a remote YN622 transceiver but again no luck.
It seems the only way you can get this to work with those particular transceiver units is to use the supplied PC-sync cable, which can be plugged into the YN622 transceivers and then directly into the S1.
The good news is that doing it this way, you can still use the S1 remote to set the power settings (again, across up to 3 groupings of S1’s).
Also, while the S1 is firing with a manual power setup, any other flashes you use (assuming they are compatible) can still be set to TTL output, which is pretty nifty too.
This post suggests that you can do what you are trying to do with a profoto transmitter sitting atop the Pocket Wizard, so I would have thought the Interfit S1 would work too.
When I get a chance, I’ll borrow a set of Pocket Wizards and try it out with the S1 for you, but I can’t see any reason why it shouldn’t at least work the way I described with the Yongnou controllers.
excellent review – thanks! Couple of questions – have you shot any action with these, particularly with HSS? Still dreaming of action HSS fill. Also – how do you find the quality and robustness of the interfit soft boxes and the speedrings. Solid, any play? One of the things I love about the profoto is how solid their mount and sot boxes are – no play, no flimsiness – just easy, fast, and robust. I shoot in the field (rarely in the studio), and need a fast, light, solid strobe options with good modifiers. What is holding me back for the profoto besides the price is the slow T1’s and that I could not actually get the HSS to work reliably (Nikon D4s and D750). Does the S1 have a simple forward facing umbrella shaft mount? Tack så mycket Jacob!
Hi Fredrik – apologies for the slow reply. We have done a shoot with the the S1 specifically using HSS outdoors in bright sunlight, though we haven’t yet had the opportunity to share the full details of the shoot. A couple of the images were shared on our instagram (https://www.instagram.com/danishapplephotography/). The big flowy dress. I’ll have more to come on that soon. A minor point, as I wouldn’t have used TTL, but I shot that before the latest firmware update, when TTL and HSS could not be used simultaneously. The latest firmware upgrade now gives you both at the same time, which is great!
Interfit have recently introduced a completely new set of softboxes and they are comparable to the Profoto equivalents. Sturdy yet light, relatively easy to set up (once you get the hang of it). Though the fitting is obviously entirely different, relying on the Bowens S-Mount type of fitting, which does open up more possibilities than Profoto’s own system.
I was a big fan of Interfit’s previous generation of softboxes which were super light and really really quick to set up, (even quicker than my lastolite ezybox). Their plastic components made them more fragile.
The latest versions have proper metal rods so although they aren’t quite as quick to open up, they do have a lot more rigidity and feel more solid.
There is an umbrella mount built into the S1, which should be visible in one of the review photos.
Thanks!
Jakob
Hi, thanks for an excellent in depth review. I’m looking for a portable monolight, mainly for outdoor shoots (weddings and portraits). I’ve already read some reviews and I’m leaning towards the Interfit s1. But before I make the final decision I have to find out answers to some of my questions, and hopefully you could help me 🙂
– Does HSS work with Pixel King Pro trigger/transciever (Nikon) or it is mandatory to buy genuine Interfit transmitter for this function?
– If I understood correctly – has now been made firmware upgrade, so HSS does also work with TTL metering?
Thanks!
Matt – sorry for the delay in coming back to you, I hadn’t spotted your comment in my inbox! Yes, HSS and TTL works together as of the latest firmware upgrade.
As for the Pixel King, I’m afraid I have no experience of this so can’t really help much. I’ve fired the S1 using Yongnuo 622N triggers and pc-sync cables, so I imagine the Pixel King would work too. Whether HSS would work is another matter, as I believe (don’t quote me though) that once you start going up to the higher sync speeds (1/1000 and up) you start getting potential timing issues, which some triggers either adjust for automatically or allow you to adjust for manually, and I don’t know if yours would do that.